Achieving a high - gloss finish on floors is a goal that many homeowners, business owners, and contractors aspire to. A high - gloss floor not only enhances the aesthetic appeal of a space but also provides durability and ease of maintenance. As a leading supplier of Diamond Floor Grinders, I am here to share some expert tips on how to achieve that stunning high - gloss finish using our top - of - the - line equipment.
Understanding the Basics of Diamond Floor Grinders
Before delving into the process of achieving a high - gloss finish, it's essential to understand what a Diamond Floor Grinder is and how it works. A Diamond Floor Grinder is a powerful machine equipped with diamond - tipped abrasive discs. These discs are designed to grind, polish, and refine the surface of concrete, terrazzo, and other hard floor materials. The diamond abrasives are extremely hard and can effectively remove surface imperfections, stains, and rough patches, leaving behind a smooth and shiny surface.
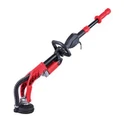
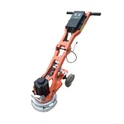
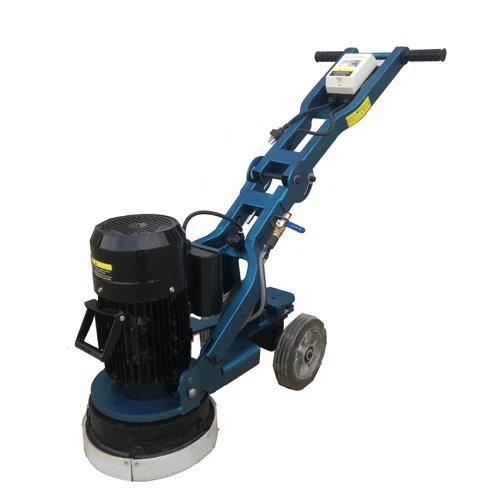
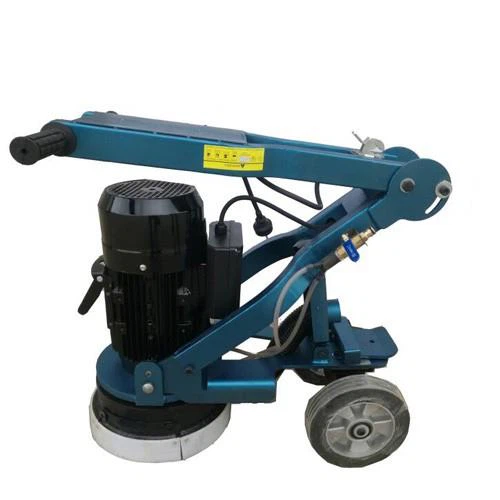
There are different types of Diamond Floor Grinders available in the market, each suited for specific applications. For instance, the Hand Held Cement Grinder is ideal for small - scale projects and hard - to - reach areas. It offers flexibility and maneuverability, allowing you to work in tight spaces with ease. On the other hand, the Concrete Floor Surface Grinder is a larger, more powerful machine designed for large - scale commercial and industrial projects. It can cover a large area quickly and efficiently, making it perfect for big warehouses, factories, and shopping malls. And if you're dealing with terrazzo tiles, the Terrazzo Tile Polishing Machine is specifically engineered to bring out the natural beauty of terrazzo, leaving it with a high - gloss finish.
Preparing the Floor for Grinding
The first step in achieving a high - gloss finish is to prepare the floor properly. This involves cleaning the floor thoroughly to remove any dirt, dust, debris, and stains. You can use a broom, vacuum cleaner, or a floor scrubber to clean the surface. Make sure to pay special attention to corners, edges, and areas with heavy soiling.
After cleaning, inspect the floor for any cracks, holes, or uneven areas. These imperfections need to be repaired before grinding to ensure a smooth and even finish. You can use a concrete patching compound to fill in cracks and holes. Allow the patching compound to dry completely according to the manufacturer's instructions.
Once the floor is clean and repaired, it's time to mark off the area to be ground. Use masking tape or chalk to define the boundaries. This will help you stay focused and ensure that you don't miss any areas during the grinding process.
Selecting the Right Grinding Discs
The choice of grinding discs is crucial in achieving a high - gloss finish. Different types of discs are designed for different stages of the grinding and polishing process. Generally, the process involves using coarse - grit discs first to remove the top layer of the floor and level the surface. As you progress, you'll switch to finer - grit discs to refine the surface and create a smooth finish.
For the initial grinding stage, use a coarse - grit diamond disc with a grit size of 20 - 40. This will help you remove any surface imperfections, stains, and rough patches quickly. As you move to the intermediate stage, switch to a medium - grit disc with a grit size of 80 - 150. This will further smooth the surface and prepare it for the final polishing stage.
For the final polishing stage, use a fine - grit diamond disc with a grit size of 300 - 3000 or higher. The higher the grit size, the glossier the finish will be. You may need to use multiple fine - grit discs in ascending order to achieve the desired level of gloss.
The Grinding Process
Now that you have prepared the floor and selected the right grinding discs, it's time to start the grinding process. Begin by attaching the appropriate grinding disc to the Diamond Floor Grinder according to the manufacturer's instructions. Make sure the disc is securely fastened to prevent any accidents.
Start the grinder and slowly move it across the floor in a back - and - forth or circular motion. Apply even pressure to ensure a uniform grind. Work in small sections at a time, overlapping each pass slightly to avoid leaving any visible marks.
As you grind, periodically check the surface to monitor the progress. If you notice any areas that are not being ground evenly, adjust the pressure or the speed of the grinder accordingly. You may also need to change the grinding disc if it becomes worn out or clogged.
The Polishing Process
After the grinding process is complete, it's time to move on to the polishing stage. This is where you'll achieve that high - gloss finish. Start by attaching a fine - grit diamond polishing disc to the grinder.
Begin the polishing process in the same way as the grinding process, moving the grinder slowly across the floor in a back - and - forth or circular motion. Apply light pressure and use a slow speed to avoid overheating the floor and causing damage.
As you polish, you'll notice that the floor starts to become smoother and shinier. Continue polishing with progressively finer - grit discs until you achieve the desired level of gloss. You may need to use a polishing compound or a sealer to enhance the gloss and protect the floor.
Post - Treatment and Maintenance
Once you have achieved the high - gloss finish, it's important to take proper care of the floor to maintain its appearance and durability. Clean the floor regularly using a mild detergent and a soft - bristled mop or a microfiber cloth. Avoid using abrasive cleaners or scrubbers that can scratch the surface.
Apply a floor sealer periodically to protect the floor from stains, moisture, and wear. Follow the manufacturer's instructions for applying the sealer and allow it to dry completely before using the floor.
In addition, avoid dragging heavy objects across the floor or using sharp objects on the surface. This can cause scratches and damage to the high - gloss finish.
Conclusion
Achieving a high - gloss finish with a Diamond Floor Grinder is a rewarding process that can transform the look of any space. By following the steps outlined in this blog, you can achieve professional - quality results. As a trusted supplier of Diamond Floor Grinders, we are committed to providing you with the best equipment and support to help you achieve your flooring goals.
If you're interested in purchasing a Diamond Floor Grinder or have any questions about the process, please feel free to contact us. Our team of experts is ready to assist you with your procurement needs and provide you with all the information you need to make an informed decision.
References
- Diamond Floor Grinding and Polishing: A Comprehensive Guide. [Publisher's Name], [Year of Publication].
- Handbook of Concrete Floor Finishing. [Author's Name], [Publisher's Name], [Year of Publication].
- Terrazzo Tile Installation and Polishing Techniques. [Author's Name], [Publisher's Name], [Year of Publication].