As a well - established provider of floor grinders, I've seen a wide range of issues that users encounter with these machines. Troubleshooting common problems can save time, money, and prevent unnecessary downtime. In this blog, I'll share some essential tips on how to troubleshoot the most common problems of a floor grinder.
1. Lack of Power or Low Performance
One of the most frequently reported issues is the floor grinder showing a lack of power or having low performance. This can be due to several factors.
Electrical Problems
- Faulty Power Cord: Start by checking the power cord. Over time, the cord can become frayed or damaged, which may lead to a poor electrical connection. Inspect the entire length of the cord for any visible signs of wear and tear. If you find a damaged section, it's crucial to replace the cord immediately to ensure safe and efficient operation. You can refer to the user manual for instructions on how to replace the cord properly.
- Tripped Circuit Breaker or Blown Fuse: A tripped circuit breaker or a blown fuse can also cause a loss of power. Check your electrical panel to see if any breakers have been tripped. If so, reset the breaker. If you are dealing with a fuse, replace it with a new one of the same amperage rating. Frequent tripping of the breaker or blowing of fuses may indicate a more serious electrical problem within the grinder, and it's advisable to have a professional electrician inspect the machine.
Motor Issues
- Motor Overheating: Running a floor grinder for an extended period without proper breaks can cause the motor to overheat. When the motor overheats, it may automatically shut down to prevent damage. Let the motor cool down completely before attempting to restart the grinder. To prevent overheating in the future, follow the manufacturer's guidelines on continuous operation time and use the grinder in a well - ventilated area.
- Worn Brushes: In some motors, the brushes can wear out over time. These brushes are responsible for conducting electricity to the motor's rotating part. If the brushes are worn, they may not make proper contact, leading to a loss of power. Check the brushes according to the user manual's instructions. If they are worn beyond the recommended limit, replace them with new brushes from a reliable supplier.
2. Uneven Grinding
Uneven grinding is another common problem that can occur when using a floor grinder. This can result in an inconsistent finish on the floor surface.
Grinding Discs
- Worn or Damaged Discs: Grinding discs are subjected to a lot of wear and tear during operation. Worn or damaged discs will not grind the floor evenly. Inspect the discs regularly for signs of uneven wear, chips, or cracks. If you notice any issues with the discs, replace them with new ones. Make sure to choose the appropriate type of Concrete Floor Grinder discs for the specific type of floor surface you are working on.
- Incorrect Disc Installation: Improper installation of the grinding discs can also lead to uneven grinding. Follow the manufacturer's instructions carefully when installing the discs. Ensure that they are tightened securely and are properly aligned. Using a torque wrench can help you achieve the correct level of tightness.
Machine Balance
- Imbalanced Grinder: A floor grinder that is not properly balanced can cause uneven pressure on the grinding discs, resulting in uneven grinding. Check if the grinder is sitting level on the floor. Some floor grinders have adjustable feet that can be used to level the machine. Additionally, make sure that all components of the grinder are properly attached and not loose. If the imbalance persists, it may be necessary to have the grinder serviced by a professional.
3. Excessive Noise
Excessive noise during operation can be not only annoying but also an indication of a problem with the floor grinder.
Loose Parts
- Loose Bolts and Screws: Over time, the vibration of the grinder can cause bolts and screws to become loose. Inspect all the bolts and screws on the grinder regularly and tighten them if necessary. Make sure to use the appropriate tools and follow the correct tightening sequence as specified in the user manual.
- Fan or Belt Issues: A noisy fan or a loose belt can also contribute to excessive noise. Check the fan for any signs of damage or imbalance. If the fan is damaged, replace it. Also, check the belt tension. A loose belt can cause noise and may slip, leading to reduced performance. Adjust the belt tension according to the manufacturer's instructions.
Bearing Problems
- Worn Bearings: Bearings are essential components that allow the moving parts of the grinder to rotate smoothly. Worn bearings can produce a loud, grinding noise. If you suspect that the bearings are worn, it's best to have them replaced by a qualified technician. Continuing to use the grinder with worn bearings can cause further damage to the machine.
4. Difficulty in Maneuvering
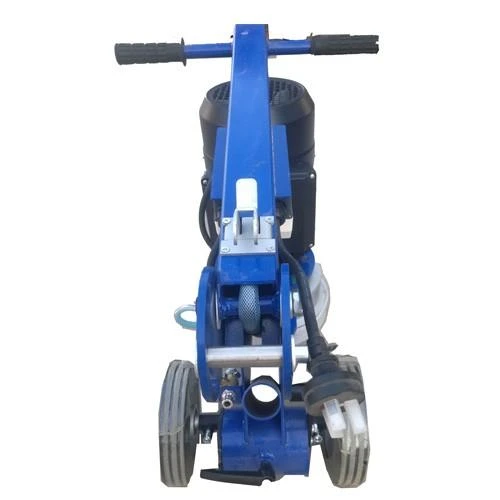
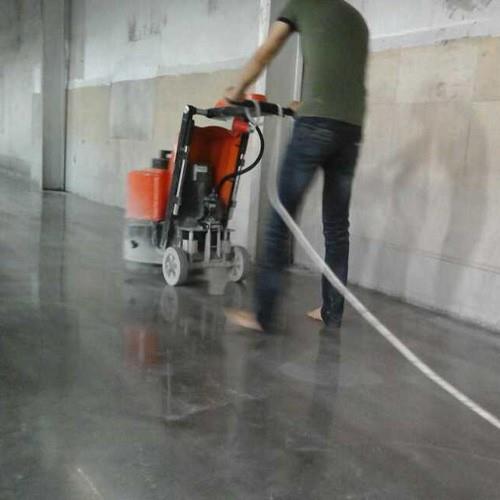
Some users may experience difficulty in maneuvering the floor grinder, making it challenging to achieve the desired grinding results.
Wheel or Caster Issues
- Worn or Damaged Wheels/Casters: The wheels or casters on the floor grinder are responsible for providing mobility. If they are worn or damaged, it can be difficult to move the grinder around. Inspect the wheels or casters for any signs of wear, flat spots, or damage. Replace them if necessary. Additionally, make sure that they are properly lubricated to ensure smooth movement.
- Incorrect Wheel Alignment: Misaligned wheels or casters can cause the grinder to pull to one side, making it difficult to control. Check the alignment of the wheels according to the user manual's instructions. Adjust the alignment if needed to ensure that the grinder moves straight and smoothly.
Weight Distribution
- Improper Weight Distribution: Uneven weight distribution on the grinder can also affect its maneuverability. Make sure that any accessories or attachments are properly installed and evenly distributed on the machine. If you are using a heavier - duty attachment, ensure that the grinder can handle the additional weight and that it is balanced correctly.
5. Dust Collection Problems
An efficient dust collection system is crucial when using a floor grinder to protect the operator from inhaling dust and to keep the work area clean.
Clogged Filters
- Filter Blockage: The dust collection filters can become clogged with dust and debris over time. A clogged filter restricts the airflow, reducing the effectiveness of the dust collection system. Check the filters regularly and clean or replace them as needed. Some filters can be washed, while others need to be replaced entirely.
- Ductwork Blockage: Inspect the ductwork connecting the grinder to the dust collector for any blockages. Dust or debris can accumulate in the ducts, preventing proper airflow. Clear any blockages in the ductwork to restore the efficiency of the dust collection system.
Dust Collector Malfunction
- Motor or Fan Issues: The motor or fan in the dust collector may malfunction, resulting in poor dust collection. Check the motor for proper operation and the fan for any signs of damage. If you suspect a problem with the motor or fan, have it inspected and repaired by a professional.
In conclusion, troubleshooting common problems of a floor grinder is an essential skill for anyone who uses these machines regularly. By following the tips outlined in this blog, you can identify and resolve many of the issues that may arise. As a floor grinder supplier, we are committed to providing high - quality products and excellent customer support. If you are experiencing problems that you cannot resolve on your own or if you are interested in purchasing a new Remote Control Concrete Grinder or Terrazzo Floor Grinder Machine, please feel free to contact us for further assistance and to discuss your purchase options.
References
- Manufacturer's User Manuals for Floor Grinders
- Industry - standard guides on floor grinder maintenance and troubleshooting