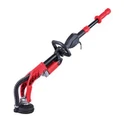
Replacing the grinding discs of a concrete grinder machine is a crucial maintenance task that can significantly impact the performance and longevity of your equipment. As a trusted supplier of link text: Stone Floor Grinding Machine, link text: Concrete Slab Grinding Machine, and link text: Brushless Floor Grinder, we understand the importance of proper disc replacement. In this blog post, we'll guide you through the process step by step, ensuring you can keep your concrete grinder in top condition.
Why Replace Grinding Discs?
Grinding discs are the workhorses of your concrete grinder. Over time, they wear down due to the abrasive nature of concrete and other materials. Worn-out discs can lead to inefficient grinding, uneven surfaces, and increased strain on the machine's motor. By replacing the discs regularly, you can maintain optimal performance, achieve better results, and extend the lifespan of your grinder.
Tools and Materials You'll Need
Before you start replacing the grinding discs, gather the following tools and materials:
- Safety equipment: Safety glasses, gloves, and a dust mask to protect yourself from debris and dust.
- Wrench or socket set: To remove and install the disc bolts.
- Replacement grinding discs: Make sure you have the correct size and type of discs for your grinder.
- Cleaning brush: To remove dust and debris from the grinder and discs.
Step-by-Step Guide to Replacing Grinding Discs
Step 1: Prepare the Grinder
- Turn off the power: Before you begin any maintenance work, make sure the grinder is turned off and unplugged from the power source. This will prevent accidental startup and ensure your safety.
- Remove the dust shroud: If your grinder has a dust shroud, remove it to access the grinding discs. Refer to your grinder's manual for instructions on how to remove the shroud.
- Clean the grinder: Use a cleaning brush to remove any dust and debris from the grinder, especially around the disc mounting area. This will ensure a clean surface for the new discs and prevent contamination.
Step 2: Remove the Old Grinding Discs
- Locate the disc bolts: Each grinding disc is typically secured to the grinder with bolts or nuts. Locate the bolts or nuts that hold the disc in place.
- Loosen the bolts: Use a wrench or socket set to loosen the bolts or nuts. Turn the wrench counterclockwise to loosen the bolts. Be careful not to drop the bolts or lose them.
- Remove the old discs: Once the bolts are loose, carefully remove the old grinding discs from the grinder. Place the old discs aside for proper disposal.
Step 3: Inspect the Disc Mounting Area
- Check for damage: Inspect the disc mounting area on the grinder for any signs of damage, such as cracks, wear, or corrosion. If you notice any damage, contact a professional for repair or replacement.
- Clean the mounting area: Use a cleaning brush to remove any remaining dust and debris from the disc mounting area. Make sure the area is clean and free of any obstructions.
Step 4: Install the New Grinding Discs
- Align the new discs: Place the new grinding discs on the disc mounting area, aligning the holes in the discs with the bolt holes on the grinder.
- Insert the bolts: Insert the bolts or nuts through the holes in the discs and into the bolt holes on the grinder. Make sure the bolts are tightened securely, but not overly tight. Over-tightening the bolts can damage the discs or the grinder.
- Tighten the bolts: Use a wrench or socket set to tighten the bolts or nuts. Turn the wrench clockwise to tighten the bolts. Make sure all the bolts are tightened evenly to ensure proper alignment and balance of the discs.
Step 5: Reassemble the Grinder
- Reattach the dust shroud: If you removed the dust shroud earlier, reattach it to the grinder. Refer to your grinder's manual for instructions on how to install the shroud.
- Clean the grinder again: Use a cleaning brush to remove any remaining dust and debris from the grinder. This will help prevent dust from entering the motor and other components.
Step 6: Test the Grinder
- Plug in the power: Once you have reassembled the grinder, plug it into the power source.
- Turn on the grinder: Turn on the grinder and let it run for a few minutes to ensure the new discs are properly installed and functioning correctly. Listen for any unusual noises or vibrations, which could indicate a problem.
- Inspect the grinding results: After the grinder has run for a few minutes, turn it off and inspect the grinding results. If the surface is uneven or the grinding is not satisfactory, check the disc installation and make any necessary adjustments.
Tips for Maintaining Your Grinding Discs
- Follow the manufacturer's recommendations: Refer to your grinder's manual for specific instructions on how to use and maintain the grinding discs. Follow the manufacturer's recommendations for disc rotation, speed, and pressure to ensure optimal performance and longevity.
- Clean the discs regularly: After each use, clean the grinding discs to remove dust and debris. This will prevent clogging and extend the life of the discs.
- Store the discs properly: When not in use, store the grinding discs in a dry, clean place. Avoid exposing the discs to moisture, heat, or direct sunlight, which can damage the discs.
- Replace worn-out discs promptly: Regularly inspect the grinding discs for signs of wear, such as uneven wear, chipping, or cracking. Replace the discs as soon as they show signs of wear to maintain optimal performance.
Conclusion
Replacing the grinding discs of a concrete grinder machine is a relatively simple process that can have a big impact on the performance and longevity of your equipment. By following the steps outlined in this guide and taking proper care of your grinder and discs, you can ensure optimal performance, achieve better results, and extend the lifespan of your grinder.


If you have any questions or need further assistance with replacing the grinding discs or maintaining your concrete grinder, please don't hesitate to contact us. We're here to help you get the most out of your equipment and achieve the best results possible.
References
- Manufacturer's manual for your concrete grinder
- Safety guidelines for working with power tools