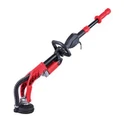
Hey there! As a supplier of Hand Held Cement Grinders, I often get asked about how to replace the grinding wheel of these handy tools. It's an important skill to have, whether you're a professional contractor or a DIY enthusiast. In this blog post, I'll walk you through the process step by step, so you can keep your grinder in top shape and get the job done right.
Why Replace the Grinding Wheel?
First off, let's talk about why you might need to replace the grinding wheel. Over time, the grinding wheel will wear down from use. A worn - out wheel won't grind as effectively, and it can also be dangerous. It might not cut through the cement smoothly, leading to uneven surfaces or even causing the grinder to kick back. Plus, a damaged wheel could break apart during operation, posing a serious safety risk. So, regular replacement is a must.
Tools You'll Need
Before you start replacing the grinding wheel, gather the necessary tools. You'll typically need a wrench, which is usually included with the grinder. Some models might also require a screwdriver. Make sure you have these tools within reach before you begin.
Safety First
Safety is always the top priority when working with power tools. Before you do anything, unplug the grinder from the power source. This will prevent any accidental starts that could lead to injury. Also, wear safety goggles to protect your eyes from any debris that might fly off during the process. Gloves are a good idea too, as they can protect your hands from sharp edges.


Step 1: Remove the Guard
The first step in replacing the grinding wheel is to remove the guard. The guard is there to protect you from flying debris during normal operation, but you'll need to take it off to access the wheel. Use the screwdriver or wrench to loosen the bolts or screws that hold the guard in place. Once they're loose, carefully remove the guard and set it aside.
Step 2: Loosen the Flange Nut
Next, you'll need to loosen the flange nut. The flange nut is what holds the grinding wheel in place. Use the wrench that came with your grinder to turn the nut counter - clockwise. It might be a bit tight, especially if the grinder has been in use for a while. Apply steady pressure, but be careful not to use too much force and damage the nut or the grinder.
Step 3: Remove the Old Grinding Wheel
Once the flange nut is loose, you can remove it completely. Then, gently pull the old grinding wheel off the spindle. Sometimes, the wheel might be stuck due to debris or rust. If this is the case, you can try tapping it lightly with a rubber mallet to loosen it. Be very careful not to hit the spindle or any other parts of the grinder.
Step 4: Inspect the Spindle and Flanges
Before you install the new grinding wheel, take a moment to inspect the spindle and the flanges. Look for any signs of damage, such as cracks or excessive wear. If you notice any problems, it's a good idea to consult a professional or contact the manufacturer for advice. A damaged spindle or flanges can affect the performance and safety of the grinder.
Step 5: Install the New Grinding Wheel
Now it's time to install the new grinding wheel. Make sure the wheel is the correct size and type for your grinder. Line up the hole in the center of the wheel with the spindle. Place the wheel onto the spindle, and then put the flange back on. Tighten the flange nut by turning it clockwise with the wrench. Make sure it's tight, but don't overtighten it, as this can damage the wheel or the grinder.
Step 6: Reattach the Guard
After the new grinding wheel is installed, reattach the guard. Line up the holes in the guard with the holes on the grinder, and then use the screwdriver or wrench to tighten the bolts or screws. Make sure the guard is securely in place, as it's an important safety feature.
Step 7: Test the Grinder
Once everything is back together, it's time to test the grinder. Plug it in (make sure you're in a safe area and wearing your safety gear). Turn the grinder on and let it run for a few seconds. Listen for any strange noises or vibrations. If everything sounds and feels normal, you're good to go. If you notice any issues, turn off the grinder immediately and double - check your work.
Related Products
If you're interested in other types of grinding machines, we also offer some great options. Check out our Garage Floor Grinding Machine, which is perfect for large - scale garage floor projects. Our Brushless Floor Grinder offers a more efficient and long - lasting performance. And if you're working on wood floors, our Wood Floor Sander Machine is a fantastic choice.
Contact Us for Purchasing
If you're in the market for a new Hand Held Cement Grinder or need replacement parts, we're here to help. We offer high - quality products at competitive prices. Whether you're a professional looking to upgrade your equipment or a DIYer starting a new project, we've got you covered. Reach out to us to start a purchasing discussion. We'll be happy to answer any questions you have and help you find the right product for your needs.
References
- Manufacturer's manual for Hand Held Cement Grinders
- Safety guidelines for power tool operation