Cleaning a stand-up concrete grinder after use is a crucial maintenance step that not only extends the tool's lifespan but also ensures its optimal performance for future projects. As a trusted stand-up concrete grinder supplier, I understand the significance of proper cleaning procedures. In this blog, I'll share a comprehensive guide on how to clean your stand-up concrete grinder effectively.
Step 1: Safety First
Before you start cleaning your stand-up concrete grinder, it's essential to prioritize safety. First, turn off the grinder and unplug it from the power source if it's an electric model. If it's a gasoline-powered grinder, let the engine cool down completely. Wear appropriate personal protective equipment (PPE), including safety glasses, gloves, and a dust mask, to protect yourself from debris and dust.
Step 2: Remove the Grinding Discs
The grinding discs are the parts of the grinder that come into direct contact with the concrete surface. Over time, they can accumulate a significant amount of concrete dust and debris. To remove the grinding discs, locate the retaining bolts or clamps that hold them in place. Use the appropriate tools, such as a wrench or socket set, to loosen and remove these fasteners. Carefully lift the grinding discs off the grinder and set them aside.
Step 3: Clean the Grinding Discs
Once the grinding discs are removed, it's time to clean them. Start by using a stiff brush to remove any loose concrete dust and debris from the surface of the discs. Pay special attention to the grooves and edges of the discs, as these areas tend to trap the most debris. If the discs are heavily soiled, you can soak them in a bucket of warm, soapy water for a few minutes to loosen the stubborn dirt. After soaking, use the brush to scrub the discs thoroughly, then rinse them with clean water and let them dry completely.
Step 4: Clean the Grinder's Housing
The housing of the stand-up concrete grinder is another area that can accumulate a lot of dust and debris. Use a vacuum cleaner with a brush attachment to remove as much loose dust as possible from the exterior of the housing. Pay attention to the vents, seams, and crevices, as these areas can trap dust and debris. Next, dampen a clean cloth with a mild cleaning solution and wipe down the housing to remove any remaining dirt and grime. Avoid using abrasive cleaners or scrubbers, as these can damage the finish of the housing.
Step 5: Clean the Motor and Electrical Components
The motor and electrical components of the stand-up concrete grinder are sensitive and require special care when cleaning. Before cleaning these parts, make sure the grinder is completely unplugged and the motor has cooled down. Use a dry, clean cloth to gently wipe the exterior of the motor and electrical components to remove any dust and debris. Avoid getting any moisture on these parts, as this can cause damage. If you notice any signs of damage or wear on the motor or electrical components, it's best to have them inspected and repaired by a qualified technician.
Step 6: Lubricate Moving Parts
Proper lubrication is essential for the smooth operation of the stand-up concrete grinder. After cleaning, apply a small amount of lubricant to the moving parts of the grinder, such as the bearings, gears, and shafts. Refer to the manufacturer's instructions for the recommended type and amount of lubricant to use. Use a clean cloth or a lubrication gun to apply the lubricant evenly to the moving parts. Make sure to wipe off any excess lubricant to prevent it from attracting dust and debris.

Step 7: Reassemble the Grinder
Once all the parts of the stand-up concrete grinder are clean and dry, it's time to reassemble the tool. Start by reinstalling the grinding discs onto the grinder. Make sure the discs are properly aligned and secured with the retaining bolts or clamps. Tighten the fasteners to the recommended torque specification using the appropriate tools. Next, check the alignment of the grinding discs to ensure they are parallel to the surface of the concrete. If necessary, adjust the alignment using the grinder's adjustment mechanism.
Step 8: Perform a Final Inspection
Before using the stand-up concrete grinder again, perform a final inspection to make sure everything is in working order. Check the tightness of all the fasteners, the alignment of the grinding discs, and the operation of the motor and electrical components. Turn on the grinder and let it run for a few minutes to make sure it is running smoothly and without any unusual noises or vibrations. If you notice any problems during the inspection, do not use the grinder and have it repaired by a qualified technician.
Conclusion
Cleaning a stand-up concrete grinder after use is a simple but essential maintenance task that can help extend the tool's lifespan and ensure its optimal performance. By following the steps outlined in this blog, you can keep your stand-up concrete grinder in top condition and ready for your next project.
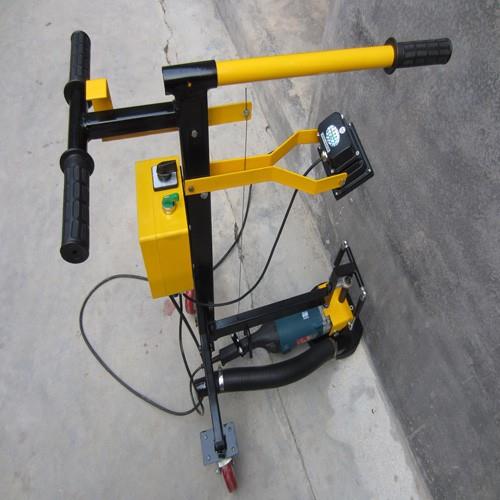
If you're in the market for a high-quality stand-up concrete grinder, we offer a wide range of options to suit your needs. Our Gasoline Concrete Floor Grinder is perfect for outdoor projects where access to electricity may be limited. The Edge Floor Grinder is designed for precision grinding along edges and corners. And our Diamond Floor Grinder provides exceptional performance and durability for heavy-duty grinding tasks.
Contact us today to discuss your concrete grinding needs and explore our product range. We're here to help you find the perfect grinder for your projects.
References
- Manufacturer's manuals for stand-up concrete grinders
- Industry best practices for tool maintenance and cleaning