Hey there! I'm super stoked to share my experience as a Planetary Floor Grinder supplier and guide you through the process of operating one for the very first time. I've seen a lot of folks get a bit overwhelmed when they first lay eyes on these powerful machines, but trust me, with a bit of know - how, you'll be grinding floors like a pro in no time.
Getting Familiar with Your Planetary Floor Grinder
Before you even think about firing up the machine, it's crucial to get to know its different parts. Planetary floor grinders come in various shapes and sizes, but they generally have some common components. You've got the grinding heads, which are the business end of the machine. These heads rotate in a planetary motion, which gives a more even and efficient grinding action compared to some other types of grinders.
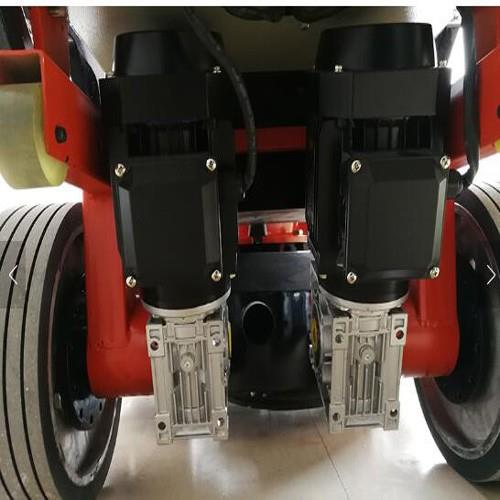
Then there's the motor. This is what powers the whole operation. Make sure you understand the power requirements of your grinder. Most of them run on electricity, but some heavy - duty models might use gas. If you're using an electric grinder, check the voltage and amperage requirements to ensure you've got the right power source.
The control panel is another important part. It's where you'll find all the buttons and switches to start, stop, and adjust the settings of the grinder. Some advanced models even come with a digital display that shows you things like the speed of the grinding heads and the power consumption.
Pre - operation Checks
Once you're familiar with the parts, it's time for some pre - operation checks. First off, inspect the grinding heads. Look for any signs of damage or excessive wear. If the grinding segments are worn out, they won't do a good job of grinding the floor, and they might even damage the machine. Replace any worn - out segments before you start.
Next, check the dust collection system. A good dust collection system is essential to keep the work area clean and to protect your health. Make sure the dust bag or container is empty and properly attached. Also, check the hoses for any blockages or leaks.
Don't forget to check the wheels and the frame of the grinder. The wheels should roll smoothly, and the frame should be sturdy. If there are any loose bolts or screws, tighten them up. This might seem like a small thing, but a wobbly grinder can be dangerous and can also affect the quality of the grinding.
Setting Up the Grinder
Now that you've done your checks, it's time to set up the grinder. First, choose the right grinding discs for the type of floor you're working on. If you're grinding a concrete floor, you'll need a different type of disc than if you're working on a stone floor. For more information on different types of grinders suitable for various floors, you can check out Grinder Floor Machine and Stone Floor Grinding Machine.
Once you've selected the discs, install them on the grinding heads. Make sure they're securely attached. You don't want a disc flying off while the machine is running!
After installing the discs, adjust the height of the grinder. This is important because it determines how aggressively the grinder will cut into the floor. If the grinder is set too high, it won't grind the floor properly. If it's set too low, it might damage the floor. Start with a medium setting and adjust as needed.
Starting the Grinder
Before you start the grinder, put on your safety gear. This includes safety glasses, a dust mask, and ear protection. The grinder can be noisy, and the dust can be harmful to your lungs.
Once you're geared up, turn on the dust collection system first. This will help keep the dust under control from the start. Then, turn on the grinder. You'll hear the motor roar to life, and the grinding heads will start spinning.
Operating the Grinder
Now comes the fun part - actually grinding the floor. Start by moving the grinder slowly across the floor in a straight line. Keep a steady pace and apply even pressure. Don't rush, and don't push too hard. Let the grinder do the work.
As you move the grinder, pay attention to the grinding action. If you notice that the grinder is leaving uneven marks on the floor, you might need to adjust the height or the speed. Some grinders allow you to adjust the speed of the grinding heads. A slower speed is usually better for more delicate floors or for the initial rough grinding, while a faster speed can be used for finishing.
If you're working on a large area, it's a good idea to work in sections. This will help you keep track of the areas you've already ground and ensure that you don't miss any spots.
Dealing with Obstacles
During the grinding process, you'll likely encounter some obstacles like pipes, columns, or door frames. When you reach an obstacle, stop the grinder and carefully maneuver it around the obstacle. You might need to use a smaller, handheld grinder to get into the tight spaces.
Some advanced grinders, like the Remote Control Concrete Grinder, make it easier to deal with obstacles. You can use the remote control to move the grinder in tight spaces without having to be right next to it.
Post - operation Procedures
Once you've finished grinding the floor, turn off the grinder and the dust collection system. Let the machine cool down for a few minutes before you start cleaning it.
Remove the grinding discs and clean them thoroughly. You can use a wire brush to remove any debris that's stuck to the discs. Then, clean the rest of the grinder, including the dust collection system. Empty the dust bag or container and clean the hoses.
Store the grinder in a dry and secure place. If you're not going to use it for a long time, cover it with a tarp to protect it from dust and moisture.
Troubleshooting
Even if you follow all the steps correctly, you might run into some problems. If the grinder isn't grinding the floor evenly, it could be due to uneven wear on the grinding heads or an incorrect height setting. Check the grinding heads and adjust the height as needed.
If the grinder is making a strange noise, it could be a sign of a mechanical problem. Stop the grinder immediately and inspect it for any loose parts or damage. If you're not sure what the problem is, it's best to call a professional for help.
Why Choose Our Planetary Floor Grinders
As a supplier, I can tell you that our planetary floor grinders are top - notch. We use high - quality materials and the latest technology to ensure that our grinders are durable, efficient, and easy to operate. Whether you're a professional contractor or a DIY enthusiast, our grinders are a great choice for all your floor grinding needs.

If you're interested in purchasing a planetary floor grinder, don't hesitate to reach out to us. We can provide you with more information about our products, answer any questions you might have, and help you choose the right grinder for your specific requirements.
Conclusion
Operating a planetary floor grinder for the first time might seem intimidating, but with the right knowledge and preparation, it's a manageable task. By following the steps I've outlined in this blog, you'll be able to operate the grinder safely and effectively. Remember to do your pre - operation checks, set up the grinder correctly, and follow the proper procedures during and after the grinding process.
If you have any further questions or if you're interested in purchasing a planetary floor grinder, feel free to contact us. We're here to help you get the job done right.
References
- "Concrete Floor Grinding and Polishing Handbook"
- Manufacturer's manuals for planetary floor grinders